
This guide may be used as a reference when you are collecting data for a campaign, but we recommend going through the motions beforehand to make sure the procedure goes smoothly and makes sense. Note that getting comfortable with the software does not have to be done outside in the dark. It will work just fine to set up and test the following procedures using your netbook, IOTA box, and the camera while leaving the camera cover on. This is also a great way to validate your camera settings rather than waiting until you’re in the field. With the camera cover on, you can also get a better sense of where the hot pixels on your camera are located.
STEP 1: OPEN VIRTUALDUB
After you have connected the camera, IOTA-VTI, and laptop,
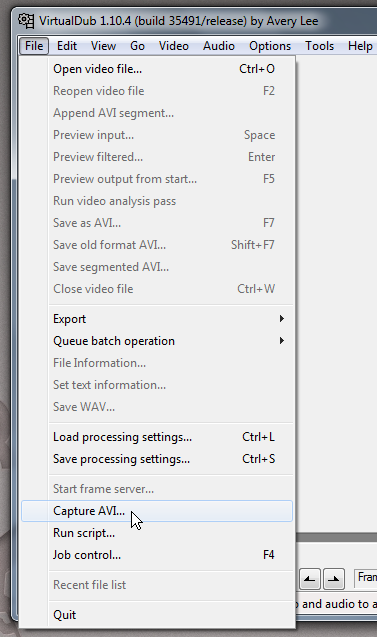
- Click the VirtualDub icon on the desktop
- On the VirtualDub menubar, select File then scroll down and select Capture AVI… to put the software in capture mode.
STEP 2: SWITCH INTO PREVIEW MODE (IF NEEDED)
After the previous step, if you see a green screen with no data, select Video -> Preview (or press the letter P on the keyboard). At this point, the green screen should be replaced by a screen showing data coming from the Mallincam and IOTA-VTI.
Note that some RECON set-ups will not require this step. As long as you have Mallincam/IOTA data visible on your laptop screen, you can continue to the next step.
STEP 3: DISABLE AUDIO
Next, click the Audio menu, and make sure Enable audio capture is not checked—disabling this option will help reduce the file size of 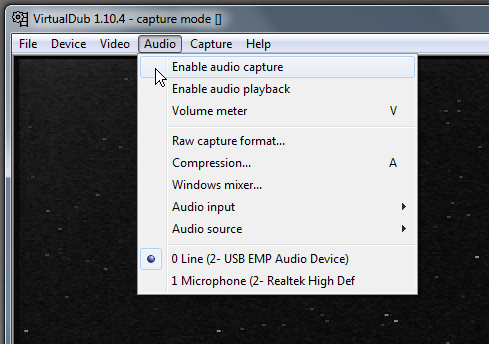 your video. After you have disabled audio capture, this setting will remain off for the duration of the VirtualDub session that you are running. However, you will need to disable audio each time you close and re-start a new session of VirtualDub. Unfortunately, VirtualDub always opens with this audio setting enabled.
STEP 4: SET CAPTURE FILE
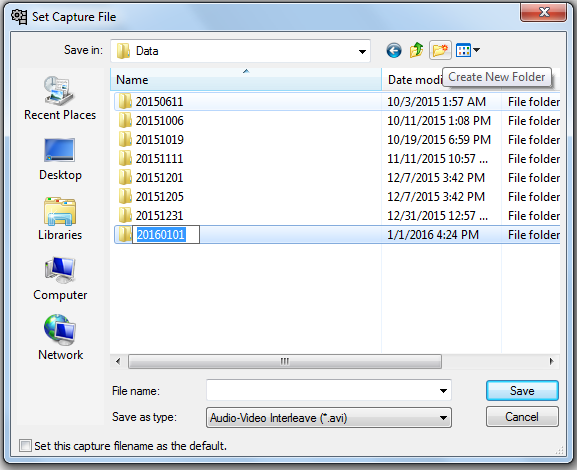
Next, click File –> Set capture file… (or press F2). This will open a window similar to that shown below. Navigate to C:/Users/RECON/Data folder. This is where all of your video files and log files should be saved. Create a new folder by clicking on the Create New Folder icon at the top-right of the window and label the folder YYYYMMDD using the current UT date. (Note the next two screen shots correspond to data taken on 2016 January 1 UT.)
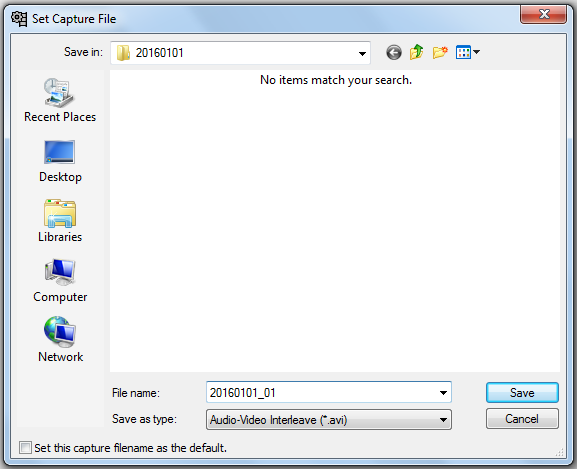
Double-click this new subdirectory and at the bottom of the window type the name your file according to this convention: “YYYYMMDD_01” where Y, M, and D are the digits representing the year, month, and day, respectively, for the UT date. The _01 is important so that VirtualDub can increment the file names of successive video files. Once you’ve typed the file name, press Save.
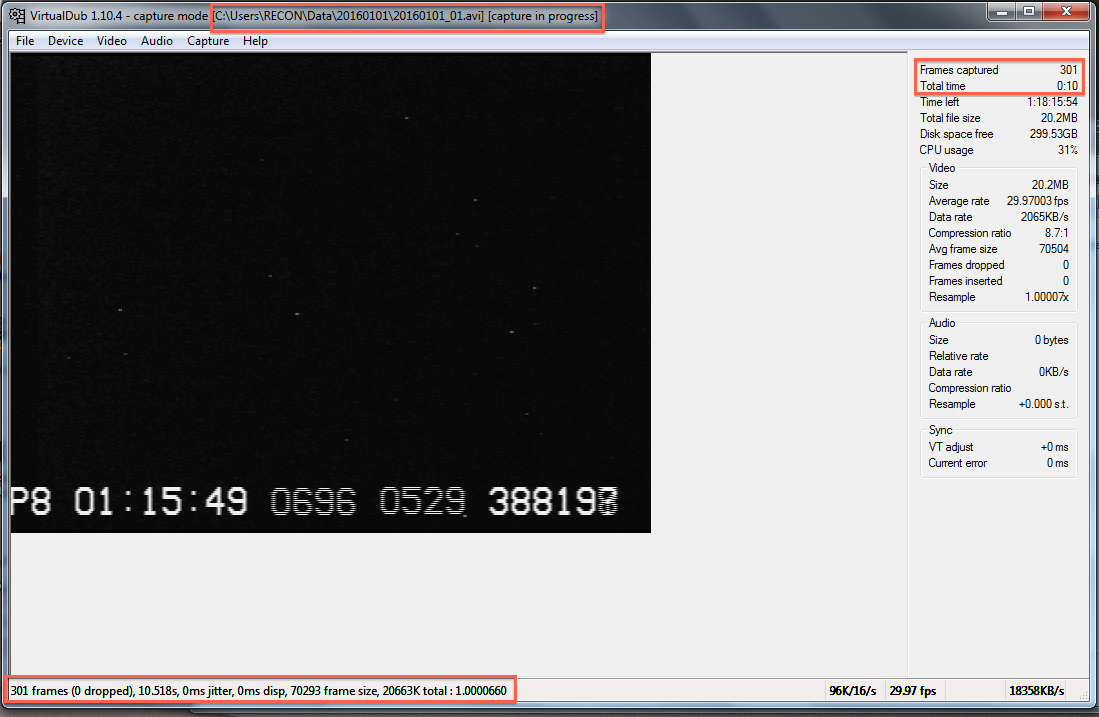
STEP 5: RECORD VIDEO
At this point, you should see a preview of the camera’s output in the main part of the window.
To start video capture:
- Press either F5 or F6 to start recording
- Confirm that recording is in progress by checking that the “Frames captured” and “Total time” are advancing in the upper right or lower left of the screen. A message indicating “capture in progress” should also display at the top of the VirtualDub window (see highlighted red rectangles below).
To stop video capture:
- Press ESC to stop recording
VirtualDub will automatically save the file to the directory set in STEP 5. VirtualDub will also automatically increment the index number on the next file (from _01 to _02 to _03, etc), so to start capturing more video, simply press F5 or F6 again
 Again, while you are becoming familiar with using VirtualDub to capture video data, we also encourage you to check out the guide on configuring your camera settings.