
This guide provides an overview for using Limovie to generate light curves from RECON video data.
STEP 1: Open Limovie ver 0.9.97.3h
- Click on the shortcut for Limovie on the desktop of RECON laptop (if needed, see guide for upgrading to Limovie ver.0.9.97.3h)
- Select RUN if prompted with security warning
STEP 2: Open video file you would like to analyze
- From the menu bar, select FILE -> AVI File Open
- Navigate to the avi file you would like to analyze and select OPEN
STEP 3: Configure Limovie to generate light curve
Limovie has many features for data analysis. To generate a light curve from an occultation event, you do not need to use all of these. The screenshot and descriptions below highlight the key settings that you need to configure to generate a lightcurve:
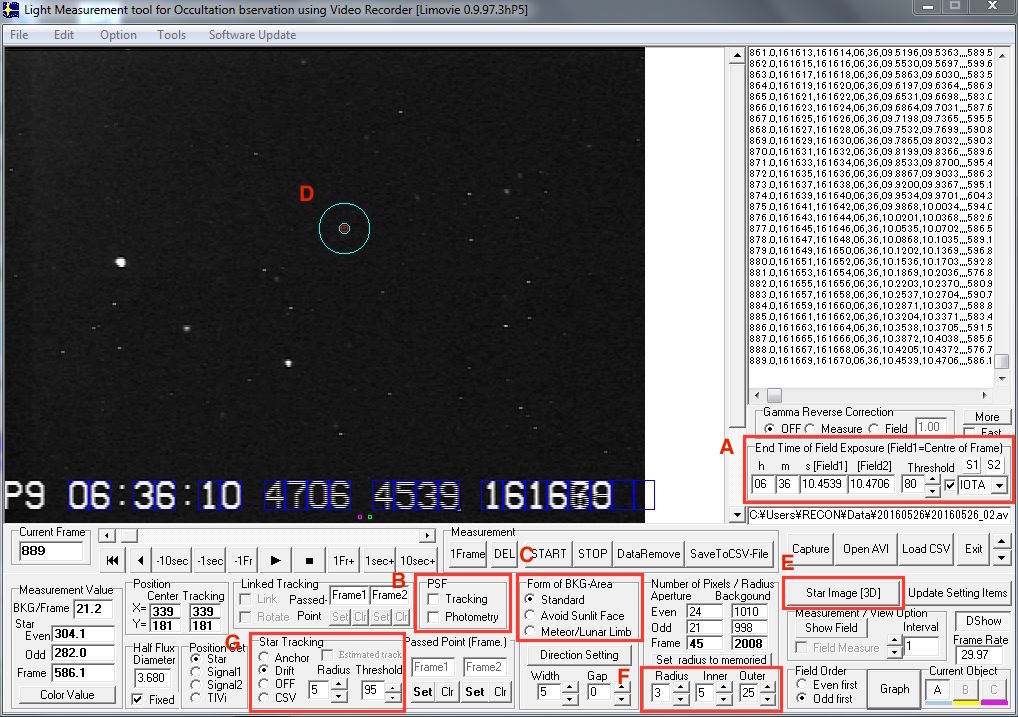
- In section labeled “End Time of Field Exposure,” use the arrow button to select IOTA and make sure that the check-box is checked. This configures LiMovie to read the time stamp information on each frame generated by the IOTA-VTI device. (Note that you can use the LiMovie menu to navigate to Option -> Update Setting Items -> Video Time Inserter to reconfigure LiMovie to always use IOTA VTI.)
- In section labeled “PSF,” uncheck both Tracking and PSF. PSF stands for Point Spread Function, a tool for characterizing how light from the star is spread out over the camera chip. However, using PSF Tracking slows down the processing time and does not result in significantly better tracking. Using PSF Photometry is most useful for measuring saturated stars (which can occur with very bright stars where more photons are received than the camera chip can record). Very few RECON events will involve saturated stars, so we recommend turning PSF Photometry off.
- In section labeled “Form of BKG-Area,” select STANDARD. You will notice that a red circle surrounded by two blue circles appears on the video image. The red circle defines the region of the video that Limovie analyzes for the star signal. The two blue circles form a doughnut that Limovie analyzes to determine the amount of background to subtract off the star signal.
- Using the cursor, click on the star that you want to analyze. The red and cyan target will move to where you click. The red circle should be centered on the target star.
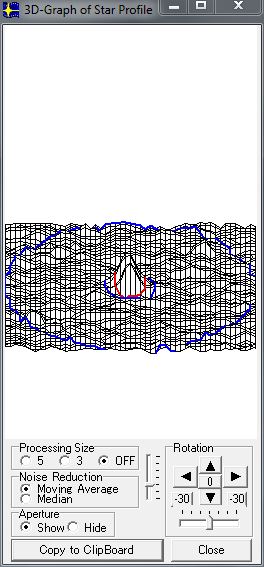
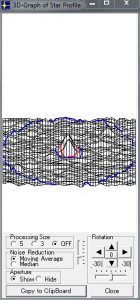 Click on the “STAR Image [3D]” button. This pulls up a three-dimensional representation of the data round the red and cyan rings. To close the 3D-Graph tool, use the “Close” button.
- In section labeled “Number of Pixels / Radius,” you can adjust the size of the red (“Radius”) and blue circles (“Inner” and “Outer”) so that the signal from the star is entirely contained within the red circle and cyan doughnut contains only background values. You can use both the video image and the 3D-Graph tool to guide this adjustment.
- In section labeled “Star Tracking,” select “Drift” so that LiMovie will follow the target star even though it may move within the field of view of the camera. You can adjust the “Radius” and “Threshold” values in this section to adjust the sensitivity of tracking.
- “Radius” is the radius that Limovie will search to see if the star has moved since the last measurement. Limited documentation recommends setting the radius to a value 2-3 pixels larger than the radius of the star profile (red circle). For videos taken on ‘windy’ nights with lots of shaking, this value should be set to a larger value.
- “Threshold” is used to establish the sensitivity of Limovie to track faint stars compared to noise. While we are not entirely clear on how the threshold setting works, limited documentation indicates that the value is a percentage of a target brightness. Pixels with values lower than this percentage are excluded from use by the tracking algorithm. We have typically had success using threshold values of 80-95.
While it is possible to select additional objects, we recommend selecting only the target star to generate your initial light curve. Because RECON telescopes are on altitude-azimuth mounts and many of our videos are longer than 15 minutes, the field of the camera will rotate as the telescope tracks the sky and LiMovie does not currently have a feature to correct for this rotation. By focusing on the target star for the duration of your video, you can determine if there are any sections of the video when the target star brightness changes significantly. You can then focus on these sections of the video using comparison stars to determine if the fluctuation is due to an occultation or another factor such as clouds (see details below).
STEP 4: Process data to generate initial light curve
After adjusting the settings above and selecting the target star that you want to analyze, you can follow the following procedure to generate a light curve for the target object.
The screenshot and descriptions below highlight the three buttons used to generate and save light curve data:
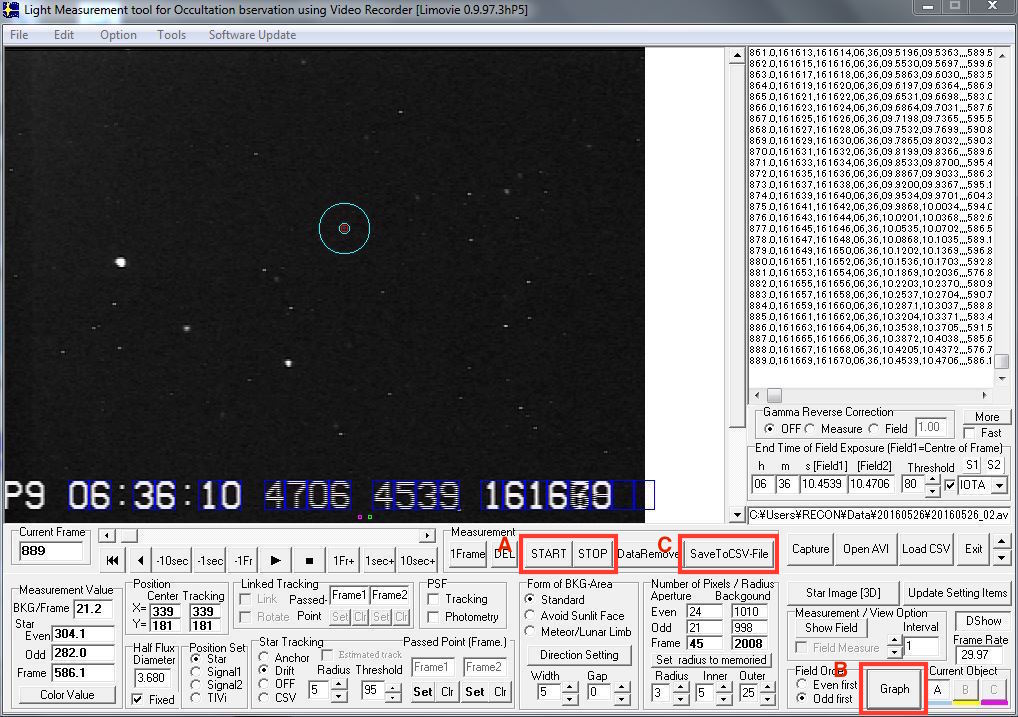
- Press the START button to analyze frames and generate light curve. You will see the video advance in the upper left window and rows of data being added in the upper right window. You can stop taking measurements at any time by selecting STOP, and you can resume collecting data by selecting START again.
- At any point in the light curve generation process, you can view lightcurve data by selecting GRAPH.
- To save the data to a file that can be viewed in Excel or other spreadsheet program, press SaveToCSVFile.
The graphing tool is useful for visualizing your light curve.
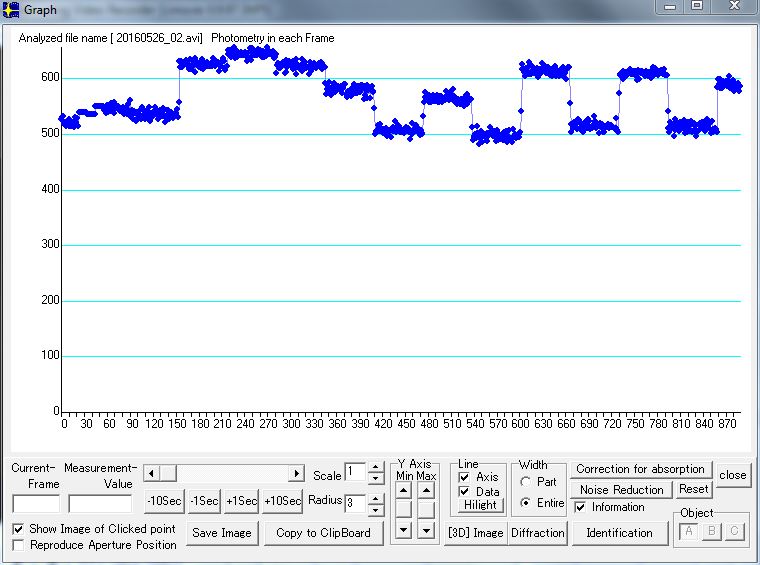
In addition, if you click on any datapoint on the graph, LiMovie will take you to the video frame from which that datapoint was collected. This is useful if you have a sudden intensity drop on your light curve and you want to watch the video to determine if this was due to an occultation or due to the star drifting out of the target aperture. If the latter, you can return to the upper right window of the main LiMovie page and highlight and delete all data entries after the star drifted out of the aperture. You can then re-center the aperture on the target star and continue recording.
You can also select SAVE IMAGE to save a copy of your light curve.
STEP 5: If positive occultation, focus in on event time
If your data shows a positive occultation event, you can now focus on the time before, during, and after the occultation. Because tracking will not work during the time that the star is being occulted, we recommend using a second or third comparison star for tracking. Assuming the event is relatively short, field rotation should not be a problem for this type of tracking.
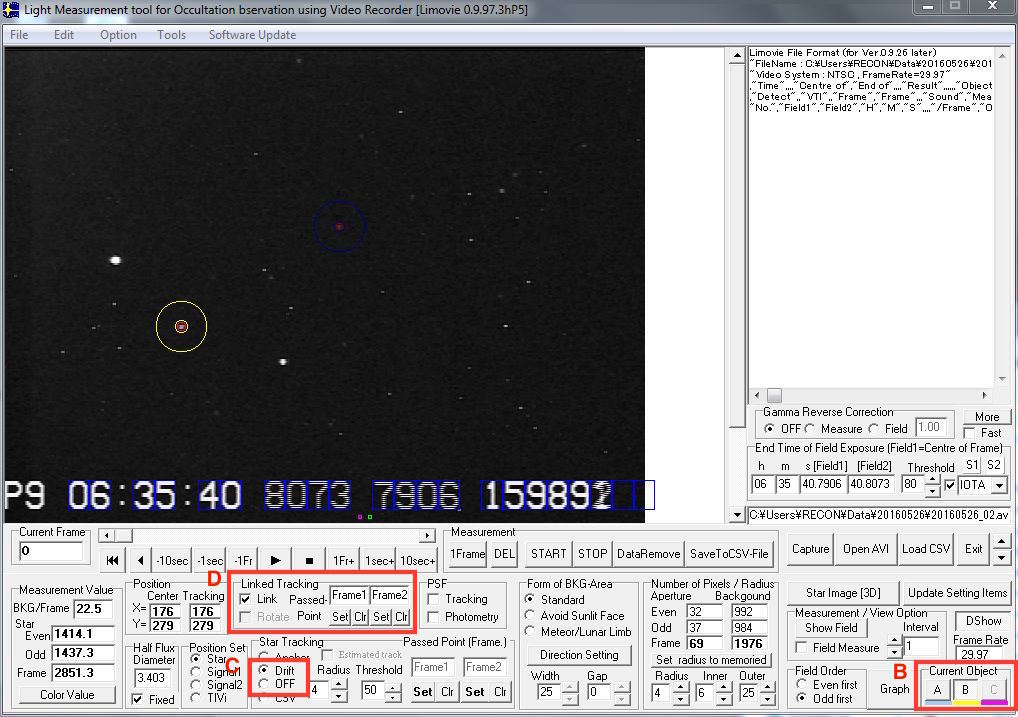
- To select a second or third star to measure, Right Click on the video image and select “Object Star Add.” A set of circles with different colors will appear. Repeat Step 3D-3F above to configure settings for these comparison stars.
- In the section labeled “Current Object,” you can toggle to settings for each object (Objects A, B, and C).
- For the target object, change the “Star Tracking” option to OFF. For the comparison object, change the “Star Tracking” option to DRIFT.
- In the section labeled “Linked Tracking,” check the LINKED box. LiMovie will track the comparison object and use any offsets in this object to move the aperture for the target object. This will be particularly useful when the target object is being occulted and is not visible in the video.
- Follow STEP 4 to process light curves for both the target and comparison star. This light curve will show both the light from the comparison star not changing while the light from the target object will decrease during the occultation.
STEP 6: Reporting light curve analysis results
Your light curve analysis is very helpful for characterizing our RECON campaign events. If your students and/or team members are able to generate light curves (showing either a positive or a negative occultation result), we would like collect your light curve analysis. We are interested in collecting the following files, which you can place in the same folder as your raw video files for uploading to SwRI using cwrsync and the following naming conventions:
- YYYYMMDD_0#_lightcurve.jpg – This is a graph of intensity versus time for the target star. You can view the lightcurve in LiMovie using the graphing tool and can save to a jpg file by selecting “Save Image.” The filename should correspond to the video file that you analyzed YYYYMMDD_0#.avi. If you have multiple light curves to save for the same video file, you can index each file using the following convention: YYYYMMDD_0#_lightcurve_v#.jpg (where _v# is _v1, _v2, _v3, etc).
- YYYYMMDD_0#_lightcurve.csv – This is a comma-separated variable (csv) file providing values output by LiMovie through your analysis. This is created by selecting SaveToCSVFile on the main window of LiMovie (see Step 4C above). The csv file corresponds to the videofile YYYYMMDD_0#. Again, you can end filename with _v# if you generated multiple lightcurves from the videofile.
- YYYYMMDD_lightcurvenotes.txt – This is a txt file containing any notes or details regarding the light curve and data. For example, your light curve data may show a drop in brightness in certain sections that you later analyze to determine that this was due to tracking issues (the star drifted out of the target aperture; the star drifted near a hot pixel that LiMovie began to track). You can provide a description of this in the notes file. To create a txt file, Right Click on the desktop of your RECON laptop and select New -> Text Document.