Event Information
Object: 03WL7
Object Type: Centaur
Geocentric closest approach at 2016/01/20 03:36:55 UTC
Sense-Up: x64
RA: 07:23:11.1 (equinox of date)
DEC: +33:46:16 (equinox of date)
Observation Times: See RECON Event Detail Page for 03WL7
Pre-Event Checklist
Thanks for completing the following pre-event items before our upcoming event:
- Plug in your power supply and RECON laptop to make sure both are fully charged well in advance of the event
- Go through the Camera Settings Guide to make important changes to your VirtualDub configuration (Steps 3 & 4 of guide) and to check and record your camera settings (Step 5).
- Run cwrsync Data Transfer Tool to upload recording of camera settings and any additional video that needs uploading
- Complete the Pre-Event Confirmation Form for 03WL7.
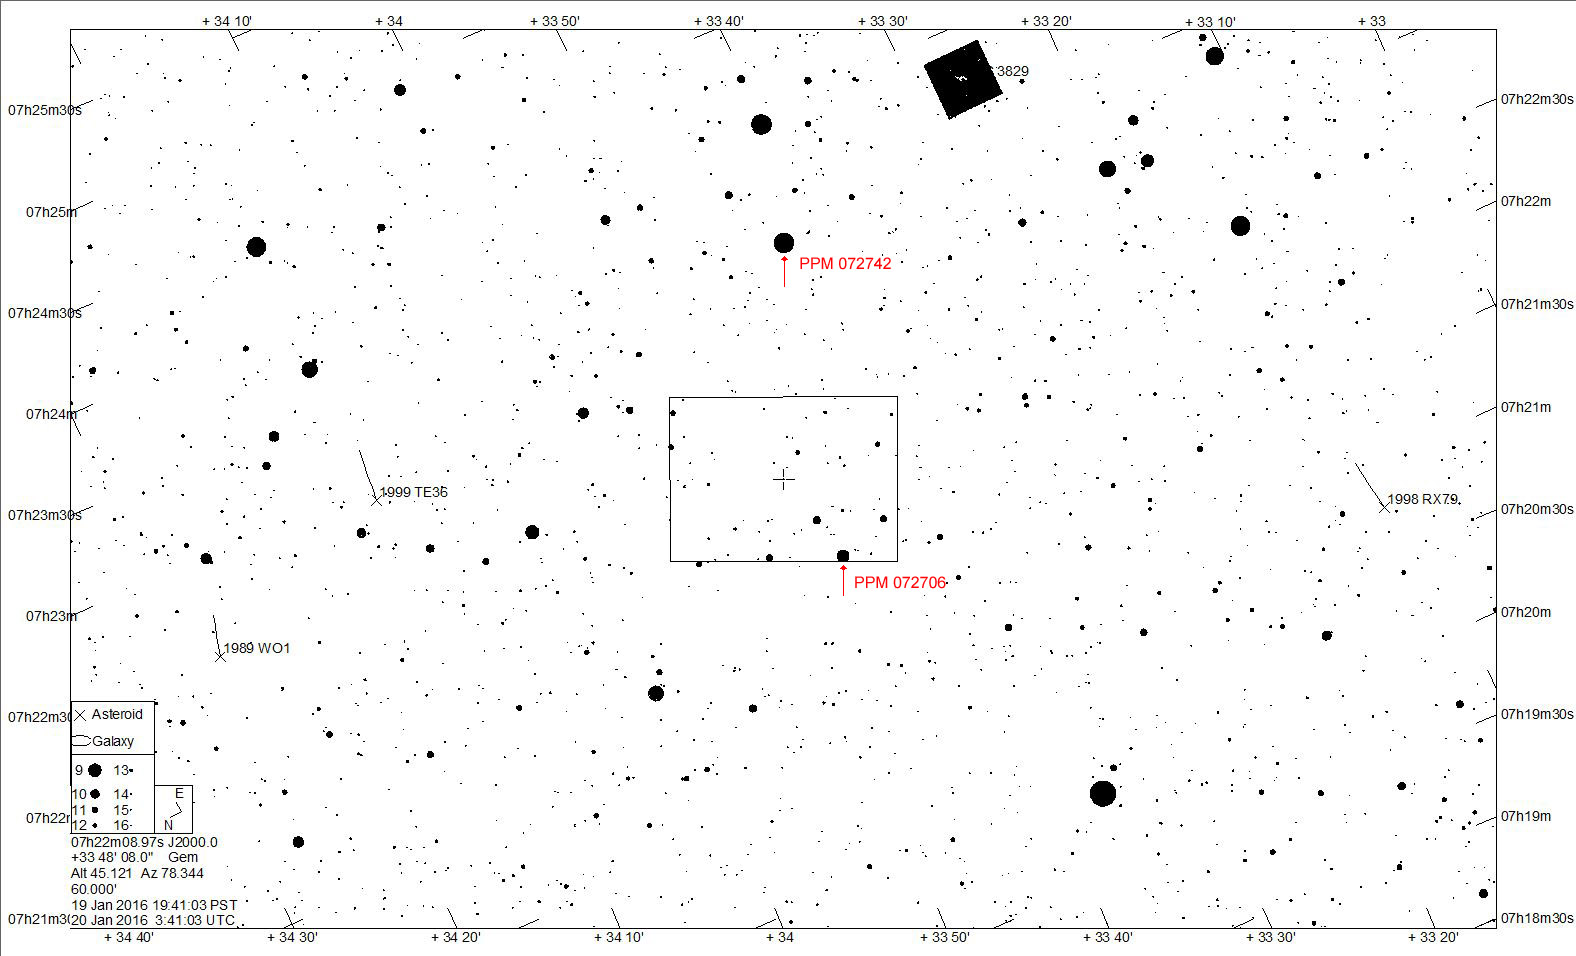
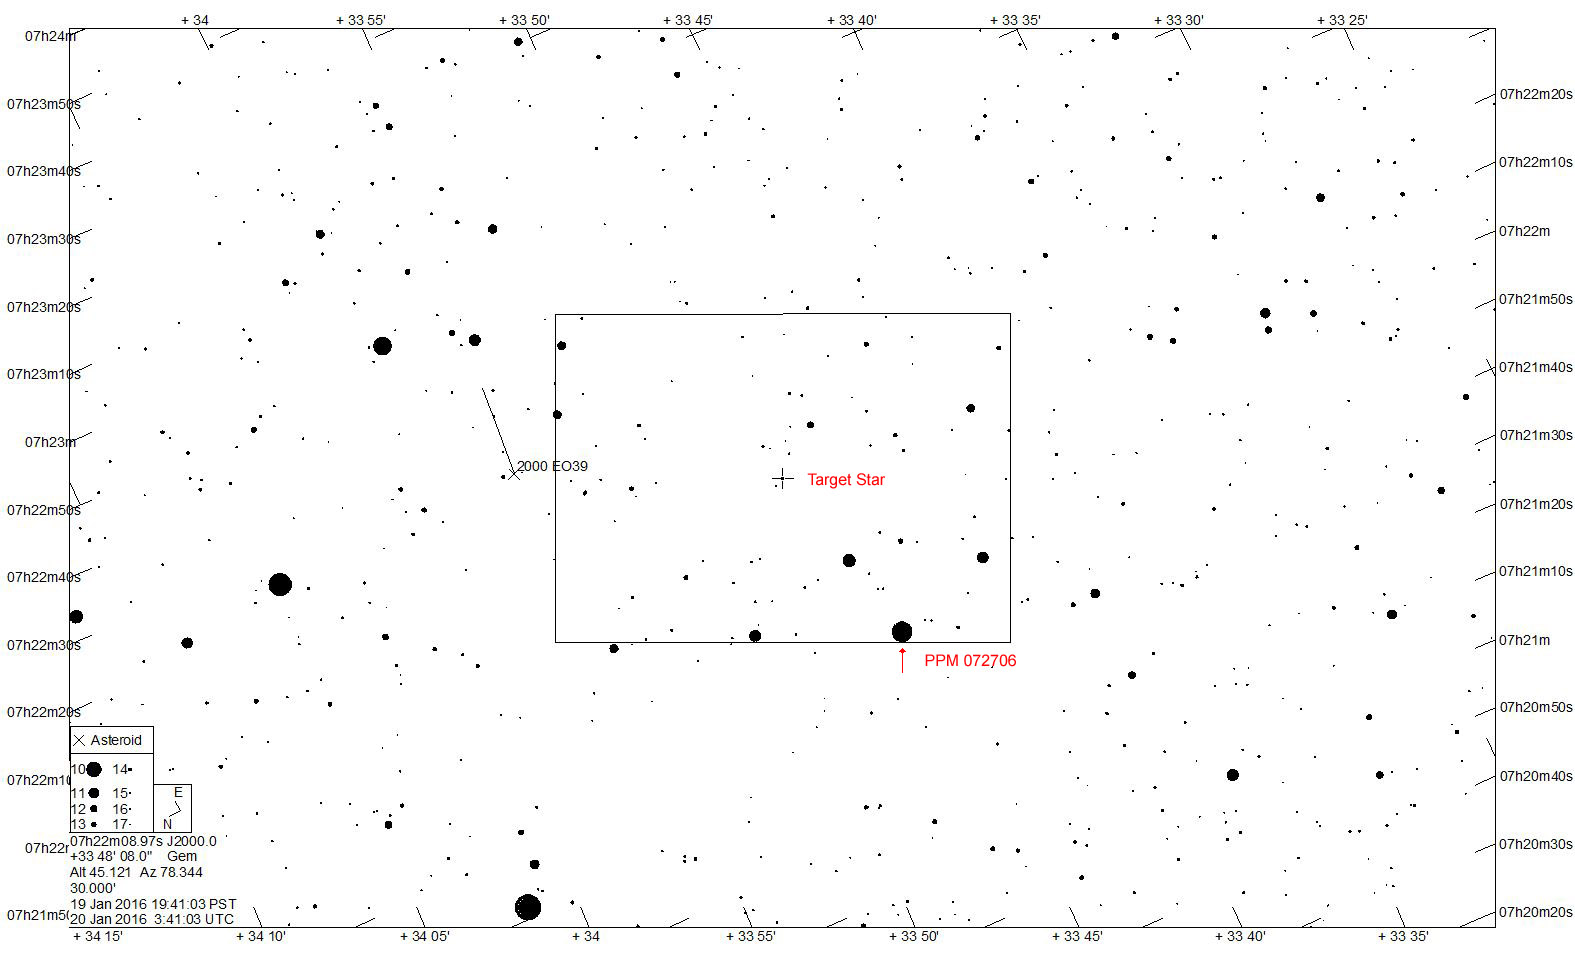
- Print this page as well as the Event Detail Page above and practice finding field prior to event. Note the revisions/addition to recording procedures outlined below.
If there are technical or scheduling issues, please contact the RECON leadership team by emailing tnorecon-org@mailman.boulder.swri.edu.
Observation Protocol
For this first event of 2016, we would like to standardize the video data files we would like each team to collect:
- Position Video – Before aligning telescope, sites should set up and power on both the telescope and camera/IOTA/computer system to allow enough time for the IOTA-VTI to update to the current almanac. Some of the IOTA-VTI boxes will indicate when the almanac has been updated while other will not. Since this can take up to 15 minutes for some of the IOTA-VTI boxes, it is best to power everything up first. You can continue to align the telescope using the camera, finding the target field, and focusing the telescope in the mean time. After the almanac has updated, record a 5-10 second video with the IOTA-VTI set to “POSITION.” This ensures we have information about where the telescope was located during the event. After you have recorded this position video, you can set the IOTA-VTI back to “TIME.”
- Event Video – Record a continuous video file during the event window listed for your location on the table found on the RECON Event Detail Page.
- Sky Field Video – After the event, you should leave the camera system powered on but turn off the power to the telescope and record a 2 minute video. The telescope will not be tracking during this video so you will see stars moving through the field of view. The video will be used to create a sky-field image for use during data processing.
- Dark Field Video – After recording the sky field video, you should cover the front end of the telescope with the lens cover and record an additional 2 minute video with no light entering the telescope. This video will be used to create a dark-field image for use during data processing.
Each of these four videos should be saved as a separate file in the directory labelled C:/Users/RECON/Data/20160120/. (Note that this directory is the UTC date of the observation.) You should set VirtualDub to save video directly to this folder with the first file being named 20160120_01. VirtualDub will then index each of the subsequent videos as 20160120_02, 20160120_03, etc. You should record the filenames and information about each file using the RECON Observation Logsheet.
Finder Charts
The following charts were provided by Jerry Bardecker using Guide 9:
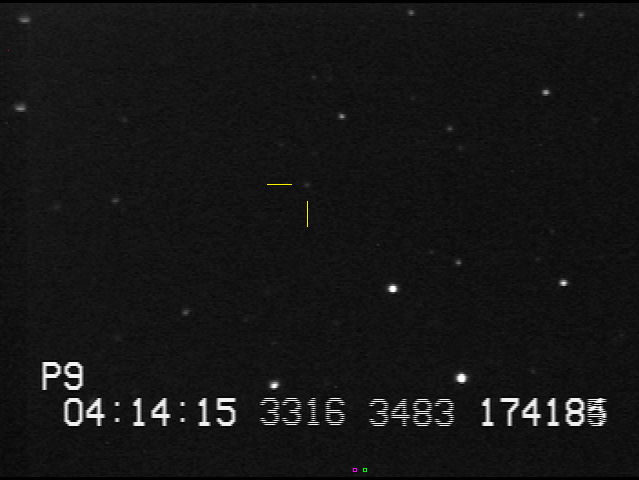
Images of Star Field
Post-Event Details
After the event, there are two last steps to each campaign:
- Complete the Post-Event Observation Report.
- Your data files should be saved in the directory C:/Users/RECON/Data/20160120 (including your logsheet). Use cwrsync (our new Data Transfer Tool) to upload your files to SwRI in Boulder. Even if you were not able to observe, please connect to the internet and open cwrsync to check whether all of your previous video saved in C:/Users/RECON/Data have been uploaded (see Data Transfer Guide for instructions on how to confirm all data has been transferred).


