Installation Instructions
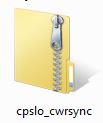
- Copy zip file for your site to C:\Users\RECON. It is important that the zip file is placed in this directory. Note also that the zip file for your community will be labelled as community_cwrsync (e.g., the file for Cal Poly SLO is labeled cpslo_cwrsync). Note the zip file icon (shown below):
- Right click on the zip file by hovering over the icon and pressing on the lower right corner of the laptop touchpad. Then select Extract All…
- Change the destination folder to be C:\Users\RECON\ and click Extract
- This will create a new folder labeled C:\Users\RECON\cwrsync. Notice that this directory has a different icon than the zip file:
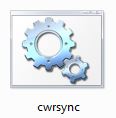
- Open up this newly created folder cwrsync. In this folder you will find over a dozen files. The first file listed should be a file labelled cwrsync – note that it has a file icon:
- Right click on this file cwrsync (first file in the directory) and select Send To -> Desktop. This will create a shortcut to the cwrsync file on your desktop.
- Rename this new shortcut to be just “cwrsync”
 This is the icon that you will use to run cwrsync
Before you can upload data to SWRI in Boulder, you need to have a directory labeled C:\Users\RECON\Data. If your RECON laptop does not have this folder, you will need to add C:\Users\RECON\Data in order to use the transfer tool. You can do this by navigating to C:\Users\RECON and then right clicking on the window and selecting New -> Folder.
Within C:\Users\RECON\Data, you should have a separate folder for each night of observing that is labeled by the UT data for that session in the format YYYYMMDD. Within this folder, each of your video files should also be labeled by date as shown below. You should also make a scan (using a scanner or smartphone app) of your Observation Logsheet and save this in the folder labeled YYYYMMDD_log. Summarized below, data should be saved using the following format:
- C:\Users\RECON\Data\YYYYMMDD
- YYYYMMDD_01 (first video file, perhaps with satellite position information)
- YYYYMMDD_02 (second video file, perhaps with recording of event)
- YYYYMMDD_03 (third video file, perhaps with sky flat recording)
- YYYYMMDD_04 (fourth video file, perhaps with dark field recording)
- YYYYMMDD_log (scanned pdf of logsheet for the evening)
Using our event on 2016 January 20 as an example, you might have the following:
- C:\Users\RECON\Data\20160120
- 20160120_01
- 20160120_02
- 20160120_03
- 20160120_04
- 20160120_log


